Wrapped loops - a secure loop for jewelry components - are an essential technique in making jewelry. Wrapped loops, unlike just a turned loop, can't come open by accident. Your dangly beads are far less likely to disappear without a trace.
Learning to create them neatly, can be a bit tricky at first. The two biggest challenges I see my students struggle with, is creating wrapped loops, neatly and consistently.
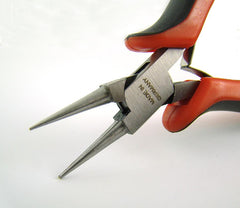
Step One - Invest in a decent pair of round nose pliers - half of the quality of your work comes from the tools you use. You don't have to break the bank - my favorite round nose pliers are EuroTool's German made ergonomic handle pliers.

Step two - Start with 1/2 hard wire - It's much easier to learn to create neat consistent loops when the wire isn't arguing with you because it's soft. Soooo - on to creating.
First thread a bead drilled top to bottom onto a 2” headpin. With your round nose pliers in your dominant hand, grasp the headpin just above the bead.
Bend the wire towards you to about a 90 degree angle. This is what it looks like from the side - notice the position of the pliers on the wire.
Without actually taking the pliers off the headpin, reposition the pliers so the top jaw of the pliers is on top of the wire as shown. The bottom jaw of the pliers stays in the same place.
Push the wire back and around the top jaw of the pliers until the wire is almost straight down against the bead.
Without letting go of your work, switch the pliers to your non-dominant hand as shown.
Bring the free end of the wire around the jaw of the pliers until it is perpendicular to the short section the bead is on.
The key to nice neat wraps, is having the free end of the wire perpendicular before wrapping towards the bead.
Wrap the free end of the wire neatly until it reaches the bead.
Neatly trim the wire next to the bead.
For more detailed wraps, and a great little tutorial that uses them all, Please see Guardian Faeries or Angels Pendant


